Musings of Glitter: hair tutorial
Showing posts with label hair tutorial. Show all posts

Monday, June 26, 2017

Signature Bouncy Curls with HerStyler


Talking about how to get my signature curls today! I get a ridiculous amount of questions about these curls - both in person and on the blog. I have super long hair, so I have lots of tips and tricks for you to get beautiful curls that will last for days! This post was brought to you in collaboration with HerStyler via Shopping Links! Check out the full tutorial below!


So first thing - grab your materials. I use a straightener, curling iron, hairspray, teasing comb and metal clips. (ps - how fun is this bright blue straightener?)


I start out by brushing my hair to get out all of the tangles, and then go in with a straightener just over my roots. This helps to get rid of any waves and tames some of my fly-aways. When straightening, be sure to only go over your roots - I go about two inches down. Just don't go past where you want the curl to begin or your curl won't hold as well.


Once all of my roots are straight, I go through and do any teasing I want. I like to tease my hair BEFORE I curl (which is backwards from a lot of hairstylists) because I like to keep my curls pretty intact. If you like a messier look, you can tease after - but I find it easier to get the curls exactly how I want them with my fingers once I'm done (and avoid breaking them up too much with a comb).

So to tease, I section off thin layers of hair, lifting them up into the air and giving it a blast of hairspray.


Then before the hairspray dries I quickly grab my teasing comb and start about an inch away from the scalp and bring the comb down towards my head - I do this several times. Just be sure to only bring your comb down, then start over - don't go back and forth or you'll break your hair. Then once it's teased, I flip it over to the other side of my head, grab a small section underneath and repeat. I do this all the way down to my ears. Then just simply flip your hair back to the correct side, take the comb and smooth out the top layer. Then do the other side!


Once you have the volume you want, you can begin curling! Now here's where I'm not too precise. I grab various sized sections of hair (typically anywhere from 1/2 in - 1 in) and wrap the hair away from my face. I usually leave a few inches uncurled at the top of my head and about an inch on the end of my hair. This just helps it to feel a bit more natural and less like Shirley Temple.


Once I curl the hair, I quickly set it up with two metal pins (going opposite directions) in the shape of the curl. This helps your curls to last forever!


Curl one side of your head (all going away from your face) and set in clips.


Then do the same to the other side - again, always curling away from your face. Once all your curls are in pins, let them cool for 5-20 minutes. The longer you let them set in the clips, the longer they'll last - but when I'm rushed, 5 minutes usually does the trick! Then just take the pins out, break up the curls a bit with your fingers and your done! You can finish with a light hairspray if you choose.


So that's it! So easy. I hope you all enjoyed this tutorial! If you recreate these curls, tag me so I can see! The key to any hairstyle is the right tools, and I absolutely LOVE mine from HerStyler - and bonus is that they're SUPER affordable, but you still get an awesome result. No need to spend a fortune for good quality. So be sure to check them out for all your hair tool needs! And a lot of their tools are super cute - they come in fun colors and prints, which is always a plus!

xoxo

Tuesday, May 24, 2016

How To: Beachy Waves with Headbands of Hope


Recently the inspiring company, Headbands for Hope, reached out to me for a collaboration. If you haven't heard of this company yet - you MUST check them out. Not only do they have the cutest hair accessories (included the head chain you see above), but the best part is that for every headband sold, one is donated to a child with cancer. Headbands of Hope is providing hope to children with cancer in hospitals all over the U.S. one headband at a time.


But being slightly accessory challenged - I teamed up with my amazing stylist Lauren Treat. Lauren is ridiculously talented with color, so of course I had her give my hair a little touch up before we started. I mean...check out that bayalage.  If you're in Conway or NWA, be sure to make an appointment with her at her salon. But if you want to see how she gave me this gorgeous style, check out the tutorial below!


First Lauren prepped my hair with Hold Me Tight Finishing Spray by Paul Mitchell to add shine and flexible hold before she curled it. Once that was worked through the hair, she sectioned off the top half and clipped it aside.


She then wrapped small sections around a one inch curling wand. She loosely wrapped varying sized sections horizontally around the barrel, and tilted the barrel vertically on the last loop so the curls fall softly from the scalp. Continue this all the way around your head (and don't forget the top section!).


To finish it off, Lauren used Aveda's Control Force Hairspray. Lauren said this is her all time fave hairspray for serious hold (even in humidity) because it dries hard initially but is easily combed through with no sticky residue left behind. It's the perfect hold especially for styles with long/heavy hair like mine or setting an updo that needs to stay in place for hours! Then she gently ran her fingers through my hair to get a nice beachy wave. Tip from Lauren - only run your fingers through the top portion, don't go all the way down the curl!


Then she attached this Pearl Head Chain by first inserting the comb forward (towards my face) to anchor it and then flipped it and pushed it backward.


Side note - I felt like a fairy princess in this head chain. I've never worn one before and I'm officially obsessed. Such a fun accessory and it looks so gorgeous on!


I hope you enjoyed this tutorial! Tag me if you decide to recreate it! I absolutely adore this head chain from Headbands of Hope - but I love their mission even more. So definitely head to their website and check out all the gorgeous hair accessories they offer! For each headband you purchase, one will be donated to a child with cancer - so it's a win win! And use code "ginahope" for $1 off!

And you can check out Lauren on her Instagram or Pinterest!


Monday, May 16, 2016

Surviving The Heat - Summer Updo

This shop has been compensated by Collective Bias, Inc. and its advertiser. All opinions are mine alone. #StyleByGoody #CollectiveBias

I teamed up with my friends over at Goody to bring you all a hairstyle tutorial today! If you're like me, you've got TONS of summer weddings coming up. And if the current weather trend continues, it is going to be seriously hot this summer. So I decided to share my favorite summer updo with y'all!


This look is super simply to do - but you will need a few things! I picked all of mine up at my local Walgreens (who just so happen to be running a BOGO "buy one get one" offer - it's a win win! Offer valid from 5/1 - 6/4)

1. Good Clean Radiance Brush - the base to any hairstyle is smooth, untangled hair and this brush does the trick! It has copper bristles which reduce buildup and leaves hair healthy and shiny.

2. Goody SlideProof Silicon Clear Ponytailers (they come in a pack of 30) - these are perfect because they're thicker than most clear elastics so they securely hold your hair but still aren't very noticable.

3. Goody Simple Styles Hair Spin Pin (they come in packs of 2) - I just used these for the first time and seriously, they each do the work of 20 bobby pins!

4. Your favorite hairspray!


First step is to thoroughly brush out your hair. Make sure you don't have any tangles! I went through and straightened my roots to make sure I have a nice smooth base before I start. But this style would look gorgeous with curly hair as well! And if you want to add any extra volume - now is the time to get out that teasing comb!


After all of your tangles are out, gather your hair to the side you want your bun on (you could even do this in the back) and start a normal 3-strand braid.


Braid all the way down and then secure with one of the clear ponytailers.


Once tied off, go through and loosen a braid the bit. The more you pull - the messier your bun will get! I typically pull mine out quite a bit to make it as thick as possible.


Once you have it loosened to your liking, simply roll the braid up and under.


Once you've reached the base of your head, use the spin pins to secure the bun. Finish it off with some hairspray!


And that's it! Heat-proof for all those summer events coming up and it literally takes less than 10 minutes!


You can even add a flower crown or whatever embellishments your heart desires! You can find all of the products I used here.

Monday, April 18, 2016

Braided Crown Tutorial

This shop has been compensated by Collective Bias, Inc. and its advertiser. All opinions are mine alone. #WholeBlends #CollectiveBias


I have had SO many of you ask me about my "signature curls" - well, it's finally here! If you want to find out how I get my curls (and this easy crown braid), check out the tutorial below!


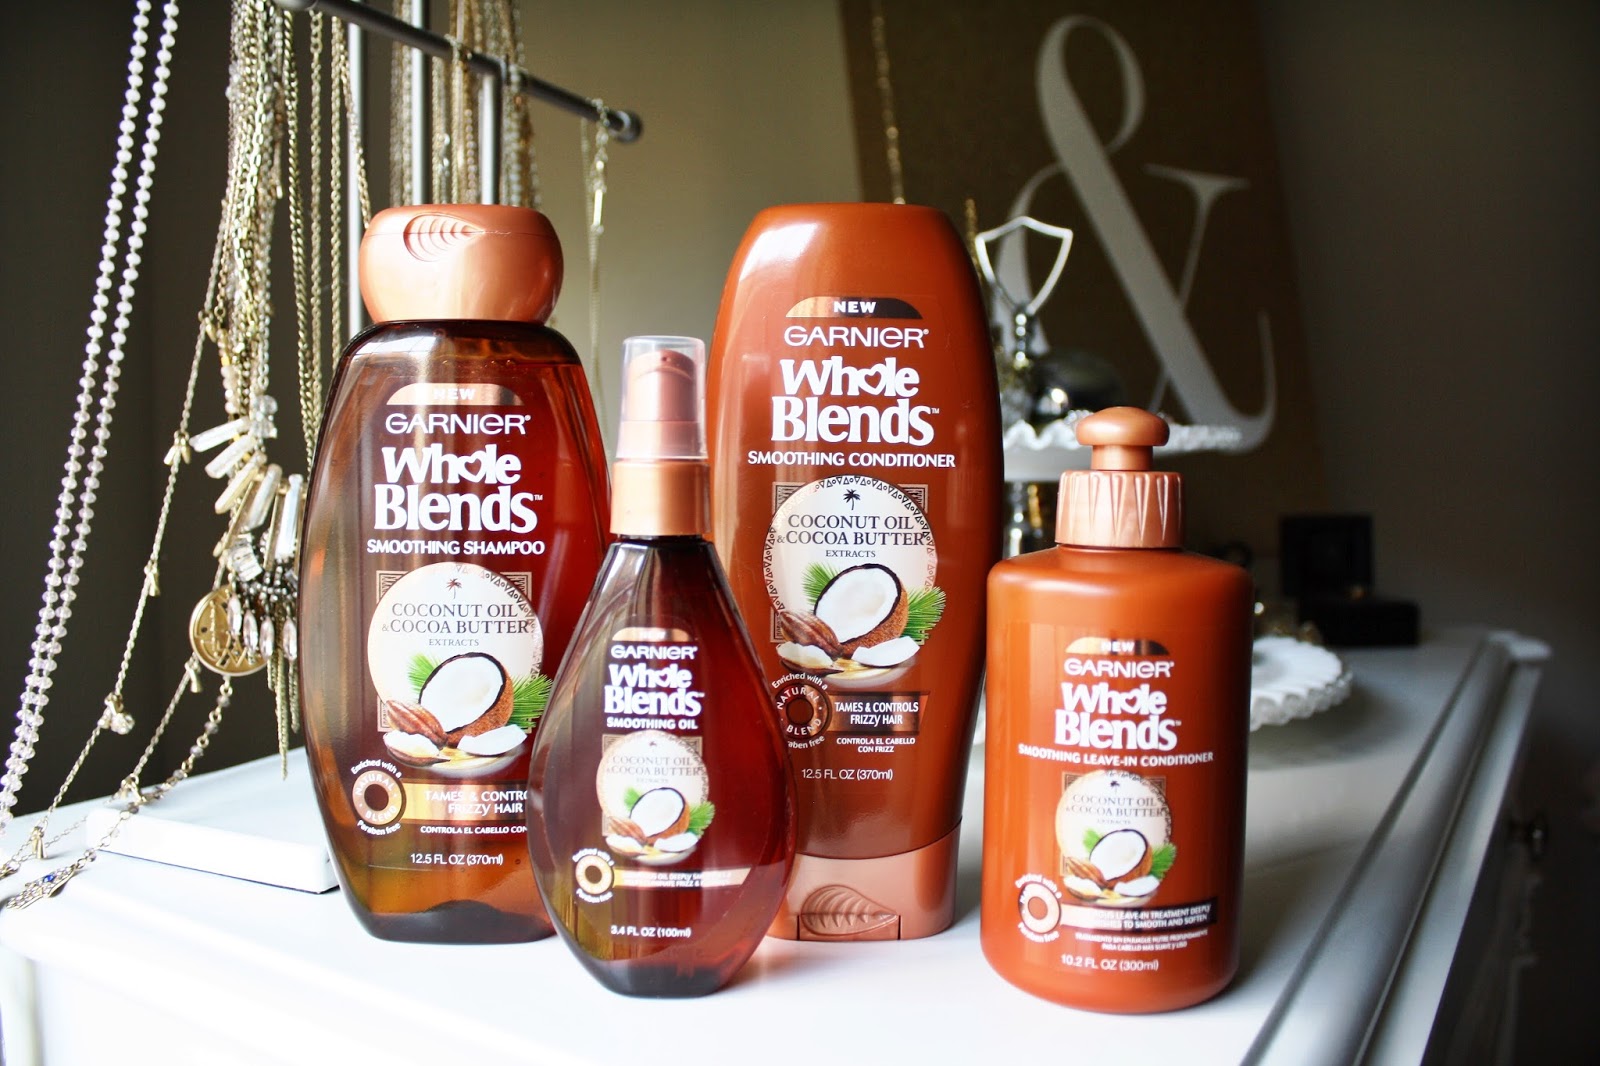
Healthy hair is the foundation to any look. I've been battling frizzy hair for as long as I can remember. I recently started using the full Garnier Whole Blends Smoothing Hair Care line and have been loving my results. It's made with coconut oil and cocoa butter extracts which helps to control my frizz! I picked up the entire line (shampoo, conditioner, leave-in conditioner and smoothing oil) at my local Walmart. And bonus - it makes your hair smell divine.


Before I start styling, I always prep my hair. I used a little bit of the smoothing oil and added on my favorite heat protectant.


Next, I started the braid. I started at my part and began doing an inverse french braid. So basically a normal french braid, but instead of taking the outside strands over the middle, you'll take the strands under the middle. 


I did this all the way around my head. The back part is the trickiest, so once I get past my ear with the braid, I reposition my hands to continue the braid all the way around. Once I've braided to the end, I tie it off with a clear elastic band and then go through and loosen the braid to make it look fuller. 


Once I pulled the braid apart to the thickness I like, I pull the end of the braid up and lay it over the braid on the opposite side of my head. Then just tuck the ends in and bobby pin away!


Now onto the curls. I use a 1-inch curling iron - but I use mine as a wand. I just grab a small section of hair and wrap it away from my face. Now the trick - when you're wrapping, simply grab onto the end of your hair and wrap. Your hair will naturally start to twist as you do this. This is what gives me those nice, mermaidy waves. 


And my main secret. I ALWAYS set my curls with flat metal clips. This allows your curl to cool in the shape you want it. Not only does this make your curls last 3 times as long, but it also makes them full and bouncy. So I set all of my hair in clips and then allow them to cool for around 10 minutes. Then once you take the clips out - add a little hairspray, give it a tease (if you like extra volume) and voila. That's it!

I hope you all enjoyed this! You can check out the entire Whole Blends line here. Which blend do you want to try?

xoxo