Musings of Glitter: braid
Showing posts with label braid. Show all posts

Monday, May 16, 2016

Surviving The Heat - Summer Updo

This shop has been compensated by Collective Bias, Inc. and its advertiser. All opinions are mine alone. #StyleByGoody #CollectiveBias

I teamed up with my friends over at Goody to bring you all a hairstyle tutorial today! If you're like me, you've got TONS of summer weddings coming up. And if the current weather trend continues, it is going to be seriously hot this summer. So I decided to share my favorite summer updo with y'all!


This look is super simply to do - but you will need a few things! I picked all of mine up at my local Walgreens (who just so happen to be running a BOGO "buy one get one" offer - it's a win win! Offer valid from 5/1 - 6/4)

1. Good Clean Radiance Brush - the base to any hairstyle is smooth, untangled hair and this brush does the trick! It has copper bristles which reduce buildup and leaves hair healthy and shiny.

2. Goody SlideProof Silicon Clear Ponytailers (they come in a pack of 30) - these are perfect because they're thicker than most clear elastics so they securely hold your hair but still aren't very noticable.

3. Goody Simple Styles Hair Spin Pin (they come in packs of 2) - I just used these for the first time and seriously, they each do the work of 20 bobby pins!

4. Your favorite hairspray!


First step is to thoroughly brush out your hair. Make sure you don't have any tangles! I went through and straightened my roots to make sure I have a nice smooth base before I start. But this style would look gorgeous with curly hair as well! And if you want to add any extra volume - now is the time to get out that teasing comb!


After all of your tangles are out, gather your hair to the side you want your bun on (you could even do this in the back) and start a normal 3-strand braid.


Braid all the way down and then secure with one of the clear ponytailers.


Once tied off, go through and loosen a braid the bit. The more you pull - the messier your bun will get! I typically pull mine out quite a bit to make it as thick as possible.


Once you have it loosened to your liking, simply roll the braid up and under.


Once you've reached the base of your head, use the spin pins to secure the bun. Finish it off with some hairspray!


And that's it! Heat-proof for all those summer events coming up and it literally takes less than 10 minutes!


You can even add a flower crown or whatever embellishments your heart desires! You can find all of the products I used here.

Monday, April 18, 2016

Braided Crown Tutorial

This shop has been compensated by Collective Bias, Inc. and its advertiser. All opinions are mine alone. #WholeBlends #CollectiveBias


I have had SO many of you ask me about my "signature curls" - well, it's finally here! If you want to find out how I get my curls (and this easy crown braid), check out the tutorial below!


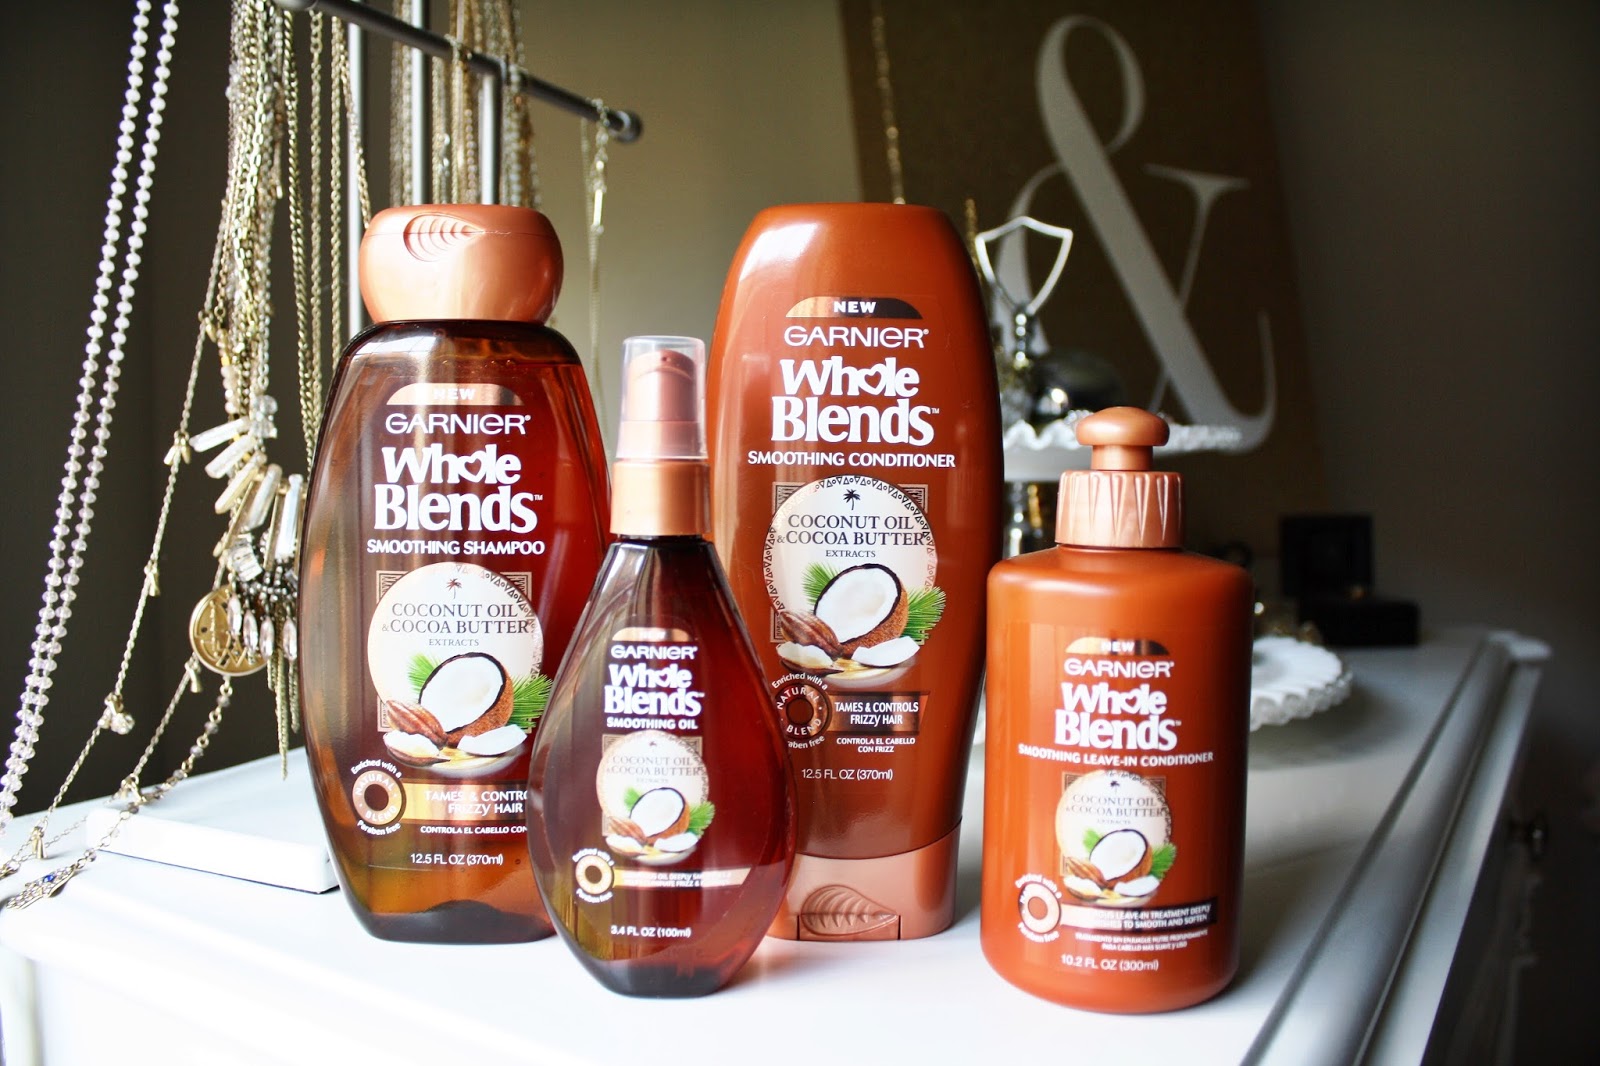
Healthy hair is the foundation to any look. I've been battling frizzy hair for as long as I can remember. I recently started using the full Garnier Whole Blends Smoothing Hair Care line and have been loving my results. It's made with coconut oil and cocoa butter extracts which helps to control my frizz! I picked up the entire line (shampoo, conditioner, leave-in conditioner and smoothing oil) at my local Walmart. And bonus - it makes your hair smell divine.


Before I start styling, I always prep my hair. I used a little bit of the smoothing oil and added on my favorite heat protectant.


Next, I started the braid. I started at my part and began doing an inverse french braid. So basically a normal french braid, but instead of taking the outside strands over the middle, you'll take the strands under the middle. 


I did this all the way around my head. The back part is the trickiest, so once I get past my ear with the braid, I reposition my hands to continue the braid all the way around. Once I've braided to the end, I tie it off with a clear elastic band and then go through and loosen the braid to make it look fuller. 


Once I pulled the braid apart to the thickness I like, I pull the end of the braid up and lay it over the braid on the opposite side of my head. Then just tuck the ends in and bobby pin away!


Now onto the curls. I use a 1-inch curling iron - but I use mine as a wand. I just grab a small section of hair and wrap it away from my face. Now the trick - when you're wrapping, simply grab onto the end of your hair and wrap. Your hair will naturally start to twist as you do this. This is what gives me those nice, mermaidy waves. 


And my main secret. I ALWAYS set my curls with flat metal clips. This allows your curl to cool in the shape you want it. Not only does this make your curls last 3 times as long, but it also makes them full and bouncy. So I set all of my hair in clips and then allow them to cool for around 10 minutes. Then once you take the clips out - add a little hairspray, give it a tease (if you like extra volume) and voila. That's it!

I hope you all enjoyed this! You can check out the entire Whole Blends line here. Which blend do you want to try?

xoxo

Friday, January 8, 2016

Love is Greater


I am STILL on Christmas break, and let me tell you - it's awesome. I don't think I fully realized how exhausted I was. If we're being honest here, grad school isn't what I thought it'd be. It kind of sucks. Okay...really sucks. But it just makes me that much more thankful for a break! I've been spending my time sleeping, eating and watching netflix. Is there anything better? I think not.

I recently came across a new company, Hello, Grace, and am newly addicted. Her designs are just as cute as can be and combine fashion + positivity.  I got the Love is Greater sweatshirt and have already gotten so many compliments on it! Not only is it super cozy, but I love that I can promote an outlook that I wholeheartedly agree with. Love IS greater. Greater than my stress, worry, happiness and sorrow - love will always win. 

I hope y'all have been having a fabulous New Year - I am so thankful for each and every one of you who have supported me in my blog! Crazy to think I just started blogging last year - what a year it has been and I can't wait to see the road ahead!

xoxo


sunglasses (similar)